The Availuator
Wouldn't it be fantastic if you could run Avail expressions directly from the workbench without first:
- Creating a source module.
- Populating it with the desired expressions.
- Defining entry points that evaluate those expressions.
- Compiling and loading the module.
- Loading it.
- And finally running some of the entry points?
Introducing… the Availuator!
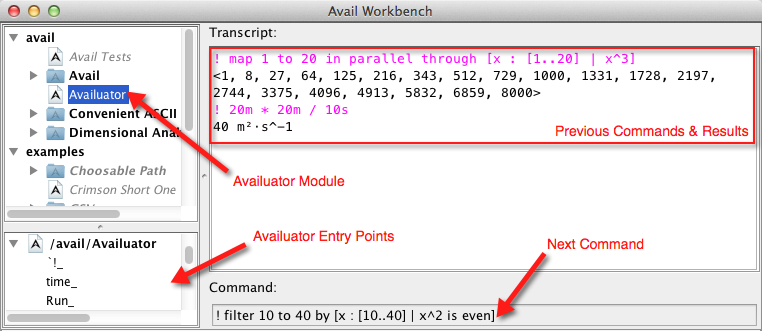
The only application that is delivered as part of the Avail standard library resides in the module,/avail/Availuator. The three entry points defined here — "`!_", "time_", and "Run_" — are collectively known as the Availuator. The Availuator is an Avail expression evaluator. It is capable of evaluating any expression exported by its siblings, the other modules within the avail module root.
Let's look at each of the entry points. Note that "time_" has two definitions; the more general definition is listed first.
"Help"- Prints help text, complete with examples, to the Avail workbench's transcript pane.
"`!_"[any]→any- Evaluate an argument expression. Answer its value.
"Run_"[[…]→⊤]→⊤- Run the specified function. If it produces a value, then answer that value.
"time_"[[…]→⊤]→whole number μs- Run the specified non-value-producing function. Answer a
dimensioned quantitythat represents the number of microseconds that elapsed during execution of the function. "time_"[[…]→any]→<whole number μs, any…|2>- Run the specified value-producing function. Answer a 2-tuple. The first element is a
dimensioned quantitythat represents the number of microseconds that elapsed during execution of the function. The second element is the value produced by the function.
The expression cookbook contains a plethora of varied expressions just waiting to be tried in the Availuator. Go on, give it a try! Be sure to load the Availuator first by double-clicking its entry in either of the tree views on the left side of the workbench.
| Return to Documentation |